
The Engulfing Bar Candlestick Forex Trading Strategy Masterclass
MASTER THE ENGULFING BAR TRADING STRATEGY. Learn How to Trade Strong Momentum Reversals with High-Probability Price Action Setups. Stop Entering Weak Trades. Start Trading Powerful Market Momentum Shifts. Most traders lose money because they cannot identify when momentum is truly …

Overview
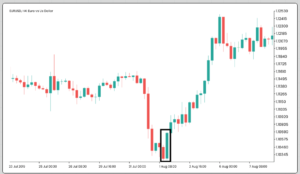
MASTER THE ENGULFING BAR TRADING STRATEGY.
Learn How to Trade Strong Momentum Reversals with High-Probability Price Action Setups.
Stop Entering Weak Trades. Start Trading Powerful Market Momentum Shifts.
Most traders lose money because they cannot identify when momentum is truly shifting in the market.
Instead, they:
- Enter trades too early before confirmation
- Get caught in false reversals
- Misread strong momentum candles
- Trade without understanding market context
- Struggle to time entries effectively
If this sounds familiar, you’re not alone.
This course was built to fix that.
Imagine Being Able To:
- Identify high-probability Engulfing Bar setups
- Understand when momentum is truly shifting
- Spot strong bullish and bearish reversals with confidence
- Enter trades with better timing and confirmation
- Avoid weak or false engulfing signals
- Improve your trade accuracy and consistency
That is exactly what this course teaches you.
STUDY AT YOUR OWN PACE
- Learn anytime, anywhere
- Revisit lessons as needed
- Build your skills step-by-step
- Apply directly to live charts
Enroll Now ⇓⇓⇓

Curriculum
- 10 Sections
- 100 Lessons
- 365 Days
- SECTION 1: Introduction to Engulfing Bar TradingGet introduced to the Engulfing Bar strategy and understand why it is one of the most powerful candlestick patterns in Forex trading. Learn how engulfing candles signal strong shifts in market sentiment and momentum.11
- 1.1Lesson 1: What is an Engulfing Bar?
- 1.2Lesson 2: Why Engulfing Bars Work in Forex Markets
- 1.3Lesson 3: Market Psychology Behind Engulfing Candles
- 1.4Lesson 4: Bullish vs Bearish Engulfing Patterns
- 1.5Lesson 5: Engulfing Bars vs Other Candlestick Patterns
- 1.6Lesson 6: Advantages of Engulfing Bar Trading
- 1.7Lesson 7: Limitations of the Strategy
- 1.8Lesson 8: Best Market Conditions for Engulfing Setups
- 1.9Lesson 9: When NOT to Trade Engulfing Bars
- 1.10Lesson 10: Building the Engulfing Trader Mindset
- 1.11End of Section Multiple Choice Quiz – SECTION 1: Introduction to Engulfing Bar Trading0 Questions
- SECTION 2: Anatomy of an Engulfing CandleUnderstand the structure of bullish and bearish engulfing candles. Learn how to identify valid engulfing patterns and distinguish high-quality setups from weak or misleading signals.11
- 2.1Lesson 1: Structure of a Valid Engulfing Bar
- 2.2Lesson 2: Full Body Engulfing vs Partial Engulfing
- 2.3Lesson 3: Bullish Engulfing Formation Explained
- 2.4Lesson 4: Bearish Engulfing Formation Explained
- 2.5Lesson 5: Candle Body Strength and Momentum
- 2.6Lesson 6: Wick Considerations in Engulfing Bars
- 2.7Lesson 7: Weak vs Strong Engulfing Signals
- 2.8Lesson 8: False Engulfing Patterns Explained
- 2.9Lesson 9: Location Importance of Engulfing Bars
- 2.10Lesson 10: Chart Reading Practice
- 2.11End of Section Multiple Choice Quiz – SECTION 2: Anatomy of an Engulfing Candle0 Questions
- SECTION 3: Market Structure and Engulfing BarsLearn how engulfing bars interact with market structure. Discover how to align engulfing signals with trends, support and resistance, and key swing levels for higher-probability trades.11
- 3.1Lesson 1: Understanding Market Structure
- 3.2Lesson 2: Engulfing Bars in Trending Markets
- 3.3Lesson 3: Engulfing Bars in Ranging Markets
- 3.4Lesson 4: Break of Structure (BOS) Context
- 3.5Lesson 5: Change of Character (CHOCH) Context
- 3.6Lesson 6: Engulfing at Swing Highs and Lows
- 3.7Lesson 7: Reversal Engulfing Patterns
- 3.8Lesson 8: Continuation Engulfing Patterns
- 3.9Lesson 9: Structure-Based Filtering Rules
- 3.10Lesson 10: Practical Market Analysis
- 3.11End of Section Multiple Choice Quiz – SECTION 3: Market Structure and Engulfing Bars0 Questions
- SECTION 4: Engulfing Bar Reversal StrategyMaster how to trade market reversals using engulfing patterns. Learn how strong momentum shifts at key levels can signal trend changes and provide precise entry opportunities.11
- 4.1Lesson 1: What is a Reversal Engulfing Setup?
- 4.2Lesson 2: Bullish Reversal Engulfing Bars
- 4.3Lesson 3: Bearish Reversal Engulfing Bars
- 4.4Lesson 4: Engulfing at Support Zones
- 4.5Lesson 5: Engulfing at Resistance Zones
- 4.6Lesson 6: Liquidity-Based Reversal Concepts
- 4.7Lesson 7: Entry Timing Techniques
- 4.8Lesson 8: Stop Loss Placement Strategies
- 4.9Lesson 9: Take Profit Strategies
- 4.10Lesson 10: Real Market Reversal Examples
- 4.11End of Section Multiple Choice Quiz – SECTION 4: Engulfing Bar Reversal Strategy0 Questions
- SECTION 5: Engulfing Bar Continuation StrategyDiscover how engulfing bars can act as continuation signals in trending markets. Learn how to identify pullback entries and re-entries that align with the dominant trend.11
- 5.1Lesson 1: Trend Continuation Basics
- 5.2Lesson 2: Engulfing Bars in Strong Trends
- 5.3Lesson 3: Pullback Engulfing Setups
- 5.4Lesson 4: Entry Timing in Trends
- 5.5Lesson 5: Avoiding Counter-Trend Trades
- 5.6Lesson 6: Multi-Timeframe Trend Alignment
- 5.7Lesson 7: Momentum-Based Continuation Trades
- 5.8Lesson 8: High Probability Continuation Setups
- 5.9Lesson 9: Trade Management Techniques
- 5.10Lesson 10: Live Market Continuation Examples
- 5.11End of Section Multiple Choice Quiz – SECTION 5: Engulfing Bar Continuation Strategy0 Questions
- SECTION 6: Advanced Engulfing Bar ConceptsTake your understanding further by combining engulfing bars with advanced confluence tools such as liquidity zones, momentum strength, and multi-timeframe analysis.11
- 6.1Lesson 1: Engulfing Bars with Liquidity Zones
- 6.2Lesson 2: Engulfing Bars with Supply and Demand
- 6.3Lesson 3: Engulfing Bars with Smart Money Concepts
- 6.4Lesson 4: Engulfing Bars at Order Blocks
- 6.5Lesson 5: Engulfing Bars with Fair Value Gaps
- 6.6Lesson 6: Combining Engulfing + Pin Bar Signals
- 6.7Lesson 7: Combining Engulfing + Inside Bar Structures
- 6.8Lesson 8: Filtering Weak Engulfing Signals
- 6.9Lesson 9: High Probability Setup Selection
- 6.10Lesson 10: Advanced Chart Case Studies
- 6.11End of Section Multiple Choice Quiz – SECTION 6: Advanced Engulfing Bar Concepts0 Questions
- SECTION 7: Entry Techniques for Engulfing BarsLearn different entry strategies for engulfing setups, including aggressive and conservative entries. Understand how to time entries for better accuracy and improved risk control.11
- 7.1Lesson 1: Aggressive Entry Strategy
- 7.2Lesson 2: Conservative Entry Strategy
- 7.3Lesson 3: Break of Engulfing High/Low Entry
- 7.4Lesson 4: Retest Entry Strategy
- 7.5Lesson 5: Lower Timeframe Confirmation
- 7.6Lesson 6: Candle Close Confirmation Rules
- 7.7Lesson 7: Fake Breakout Avoidance
- 7.8Lesson 8: Momentum Confirmation Techniques
- 7.9Lesson 9: Entry Checklist Development
- 7.10Lesson 10: Live Entry Examples
- 7.11End of Section Multiple Choice Quiz – SECTION 7: Entry Techniques for Engulfing Bars0 Questions
- SECTION 8: Multi-Timeframe Engulfing StrategyLearn how to apply engulfing bar strategies across multiple timeframes. Discover how higher timeframe context improves the reliability of lower timeframe engulfing signals.11
- 8.1Lesson 1: Importance of Multi-Timeframe Analysis
- 8.2Lesson 2: Higher Timeframe Engulfing Bias
- 8.3Lesson 3: Daily Chart Engulfing Analysis
- 8.4Lesson 4: 4H Engulfing Setups
- 8.5Lesson 5: 1H and 15M Entry Refinement
- 8.6Lesson 6: Top-Down Trading Approach
- 8.7Lesson 7: Aligning Structure Across Timeframes
- 8.8Lesson 8: Filtering Noise on Lower Timeframes
- 8.9Lesson 9: Confluence-Based Entry Selection
- 8.10Lesson 10: Practical Multi-Timeframe Examples
- 8.11End of Section Multiple Choice Quiz – SECTION 8: Multi-Timeframe Engulfing Strategy0 Questions
- SECTION 9: Risk Management for Engulfing TradingDevelop strong risk management skills tailored to engulfing bar trading. Learn how to set stop losses, manage position sizing, and maintain consistent risk-to-reward ratios.11
- 9.1Lesson 1: Importance of Risk Management
- 9.2Lesson 2: Position Sizing Techniques
- 9.3Lesson 3: Stop Loss Placement Strategies
- 9.4Lesson 4: Risk-to-Reward Optimization
- 9.5Lesson 5: Managing Losing Trades
- 9.6Lesson 6: Scaling Into Winning Trades
- 9.7Lesson 7: Emotional Control in Trading
- 9.8Lesson 8: Avoiding Overtrading Engulfing Setups
- 9.9Lesson 9: Trade Management Rules
- 9.10Lesson 10: Building Consistency
- 9.11End of Section Multiple Choice Quiz – SECTION 9: Risk Management for Engulfing Trading0 Questions
- SECTION 10: Building a Complete Engulfing Trading SystemBring everything together into a structured trading system. Learn how to build a complete engulfing bar strategy with clear rules for entries, exits, journaling, backtesting, and disciplined execution for long-term trading success.11
- 10.1Lesson 1: Creating a Full Engulfing Trading Plan
- 10.2Lesson 2: Entry Checklist Development
- 10.3Lesson 3: Trade Journal Setup
- 10.4Lesson 4: Backtesting Engulfing Strategies
- 10.5Lesson 5: Forward Testing in Live Markets
- 10.6Lesson 6: Identifying High Probability Setups
- 10.7Lesson 7: Common Trader Mistakes
- 10.8Lesson 8: Daily Trading Routine
- 10.9Lesson 9: Performance Review System
- 10.10Lesson 10: Becoming a Professional Engulfing Trader
- 10.11End of Section Multiple Choice Quiz – SECTION 10: Building a Complete Engulfing Trading System0 Questions
You May Like

Forex Trading Strategy Masterclass
MASTER PRICE ACTION FOREX TRADING STRATEGIES. Learn How to Trade Forex Using Proven High-Probability Setups (Step-by-Step System). Stop Guessing. Start Trading With Structure. Most beginner traders fail not because forex is complicated—but because they trade without a clear system. They …

Advanced Liquidity & Smart Money Trading Masterclass
MASTER ADVANCED LIQUIDITY TRADING STRATEGY. Learn How Smart Money Uses Liquidity to Enter and Exit the Forex Market with Precision. Stop Chasing the Market. Start Trading Like the Institutions. Many traders struggle to achieve consistent profits because they don’t understand …
Smart Money Concepts Mastery for Forex Traders
MASTER SMART MONEY CONCEPTS THAT EVERY TRADER MUST KNOW. Learn How Institutions Move the Forex Market and How to Trade Alongside Them. Stop Trading Like a Retail Trader. Start Thinking Like Smart Money. Most traders struggle not because forex is …
Inside Bar Candlestick Forex Trading Strategy Mastery
MASTER THE INSIDE BAR TRADING STRATEGY. Learn How to Trade Market Consolidation Breakouts with Precision and Confidence. Stop Entering Random Breakouts. Start Trading Structured Price Compression. Most traders struggle because they enter the market without understanding what price is actually doing …
Pin Bar Candlestick Forex Trading Strategy Masterclass
MASTER THE PIN BAR TRADING STRATEGY. Learn How to Trade Reversal Signals with High-Probability Price Action Setups. Stop Entering Trades Too Early. Start Trading Rejections With Precision. Most traders lose money because they misread market reversals and enter trades without …

Course Features
- Lectures 100
- Quizzes 10
- Duration 365 days
- Skill level Beginner
- Language English
- Students 309
- Certificate Yes
- Assessments Self