
Supply & Demand Trading Strategy Masterclass
MASTER SUPPLY AND DEMAND TRADING STRATEGY. Learn How to Identify High-Probability Price Zones Where Institutions Place Their Orders. Stop Trading Random Levels. Start Trading Real Market Zones. Most traders fail because they don’t understand where price is likely to react. …

Overview
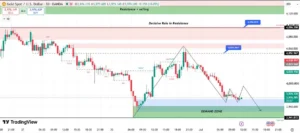
MASTER SUPPLY AND DEMAND TRADING STRATEGY.
Learn How to Identify High-Probability Price Zones Where Institutions Place Their Orders.
Stop Trading Random Levels. Start Trading Real Market Zones.
Most traders fail because they don’t understand where price is likely to react.
Instead, they:
- Draw random support and resistance lines
- Enter trades without understanding market zones
- Get stopped out by fake breakouts
- Trade in low-probability areas
- Ignore institutional order flow
If this sounds familiar, you’re not alone.
This course was built to fix that.
Imagine Being Able To:
- Identify high-probability supply and demand zones
- Understand where institutional orders are likely placed
- Predict where price is likely to react or reverse
- Avoid low-quality trading areas
- Improve entry timing and accuracy
- Trade with structure instead of guesswork
That is exactly what this course teaches you.
STUDY AT YOUR OWN PACE
- Learn anytime, anywhere
- Revisit lessons as needed
- Build your skills step-by-step
- Apply directly to live charts
Enroll Now ⇓⇓⇓

Curriculum
- 10 Sections
- 99 Lessons
- 365 Days
- SECTION 1: Introduction to Supply & Demand TradingGet introduced to the Supply & Demand trading strategy and understand how institutional buying and selling pressure drives price movement. Learn the core principles behind imbalances that create trading opportunities11
- 1.1Lesson 1: What is Supply and Demand Trading?
- 1.2Lesson 2: Why Supply and Demand Moves Financial Markets
- 1.3Lesson 3: Supply & Demand vs Support & Resistance
- 1.4Lesson 4: The Psychology Behind Market Movements
- 1.5Lesson 5: Institutional Trading and Smart Money Concepts
- 1.6Lesson 6: Retail Traders vs Institutional Traders
- 1.7Lesson 7: Understanding Market Imbalances
- 1.8Lesson 8: The Core Principles of Supply & Demand Trading
- 1.9Lesson 9: Benefits and Limitations of the Strategy
- 1.10Lesson 10: Setting Up Your Trading Platform
- 1.11End of Section Multiple Choice Quiz – SECTION 1: Introduction to Supply & Demand Trading0 Questions
- SECTION 2: Market Structure FundamentalsBuild a strong foundation in market structure by learning how trends, swing highs and lows, and break of structure influence supply and demand zones. This section helps you read the market context before placing trades.10
- 2.1Lesson 1: Understanding Market Structure
- 2.2Lesson 2: Higher Highs and Higher Lows
- 2.3Lesson 3: Lower Highs and Lower Lows
- 2.4Lesson 4: Identifying Trends and Ranges
- 2.5Lesson 5: Break of Structure (BOS)
- 2.6Lesson 6: Change of Character (CHOCH)
- 2.7Lesson 7: Market Cycles Explained
- 2.8Lesson 8: Trend Continuation vs Reversal
- 2.9Lesson 9: Practical Market Structure Analysis
- 2.10End of Section Multiple Choice Quiz – SECTION 2: Market Structure Fundamentals0 Questions
- SECTION 3: Understanding Supply ZonesLearn how supply zones form when selling pressure outweighs buying pressure. Discover how to identify strong supply areas where price is likely to react or reverse.11
- 3.1Lesson 1: What is a Supply Zone?
- 3.2Lesson 2: Characteristics of Strong Supply Zones
- 3.3Lesson 3: Fresh vs Tested Supply Zones
- 3.4Lesson 4: Identifying Institutional Selling Areas
- 3.5Lesson 5: Rally-Base-Drop Patterns
- 3.6Lesson 6: Drop-Base-Drop Patterns
- 3.7Lesson 7: Measuring Supply Zone Strength
- 3.8Lesson 8: Common Mistakes in Identifying Supply
- 3.9Lesson 9: Multi-Timeframe Supply Analysis
- 3.10Lesson 10: Real Chart Examples of Supply Zones
- 3.11End of Section Multiple Choice Quiz – SECTION 3: Understanding Supply Zones0 Questions
- SECTION 4: Understanding Demand ZonesUnderstand how demand zones are created when buying pressure dominates the market. Learn how to spot high-probability demand areas where price may bounce or rally.11
- 4.1Lesson 1: What is a Demand Zone?
- 4.2Lesson 2: Characteristics of Strong Demand Zones
- 4.3Lesson 3: Fresh vs Tested Demand Zones
- 4.4Lesson 4: Identifying Institutional Buying Areas
- 4.5Lesson 5: Drop-Base-Rally Patterns
- 4.6Lesson 6: Rally-Base-Rally Patterns
- 4.7Lesson 7: Measuring Demand Zone Strength
- 4.8Lesson 8: Common Mistakes in Identifying Demand
- 4.9Lesson 9: Multi-Timeframe Demand Analysis
- 4.10Lesson 10: Real Chart Examples of Demand Zones
- 4.11End of Section Multiple Choice Quiz – SECTION 4: Understanding Demand Zones0 Questions
- SECTION 5: Drawing Supply and Demand Zones CorrectlyMaster the skill of accurately marking supply and demand zones on your charts. Learn how to refine zones for precision entries and avoid weak or invalid areas.11
- 5.1Lesson 1: Rules for Drawing Zones
- 5.2Lesson 2: Identifying the Base
- 5.3Lesson 3: Understanding the Departure
- 5.4Lesson 4: How Wide Should a Zone Be?
- 5.5Lesson 5: Refining Zones for Better Entries
- 5.6Lesson 6: Zone Freshness and Quality
- 5.7Lesson 7: Timeframe Selection for Zone Drawing
- 5.8Lesson 8: Marking Zones on MT4/MT5
- 5.9Lesson 9: Marking Zones on TradingView
- 5.10Lesson 10: Practical Zone Drawing Exercises
- 5.11End of Section Multiple Choice Quiz – SECTION 5: Drawing Supply and Demand Zones Correctly0 Questions
- SECTION 6: Entry Techniques Using Supply & DemandLearn how to time your entries using supply and demand zones. Discover conservative and aggressive entry methods for maximizing trade accuracy and reward potential.11
- 6.1Lesson 1: The Aggressive Entry Method
- 6.2Lesson 2: The Conservative Entry Method
- 6.3Lesson 3: Confirmation Entries
- 6.4Lesson 4: Price Action Confirmation Signals
- 6.5Lesson 5: Candlestick Confirmation Patterns
- 6.6Lesson 6: Engulfing Pattern Entries
- 6.7Lesson 7: Pin Bar Entries
- 6.8Lesson 8: Break and Retest Entries
- 6.9Lesson 9: Lower Timeframe Confirmation
- 6.10Lesson 10: Trade Entry Checklist
- 6.11End of Section Multiple Choice Quiz – SECTION 6: Entry Techniques Using Supply & Demand0 Questions
- SECTION 7: Advanced Supply & Demand ConceptsTake your understanding further by combining supply and demand with liquidity, momentum, and market structure for higher-probability setups and improved trade filtering.11
- 7.1Lesson 1: Understanding Liquidity
- 7.2Lesson 2: Liquidity Sweeps and Stop Hunts
- 7.3Lesson 3: Smart Money Concepts Explained
- 7.4Lesson 4: Order Blocks vs Supply & Demand Zones
- 7.5Lesson 5: Fair Value Gaps (FVGs)
- 7.6Lesson 6: Imbalances in the Market
- 7.7Lesson 7: Market Manipulation Techniques
- 7.8Lesson 8: Institutional Footprints
- 7.9Lesson 9: Combining Smart Money with Supply & Demand
- 7.10Lesson 10: Advanced Chart Analysis
- 7.11End of Section Multiple Choice Quiz – SECTION 7: Advanced Supply & Demand Concepts0 Questions
- SECTION 8: Multi-Timeframe AnalysisLearn how to analyze supply and demand zones across multiple timeframes. Understand how higher timeframe zones influence lower timeframe trade execution.11
- 8.1Lesson 1: Understanding Higher Timeframes
- 8.2Lesson 2: Understanding Lower Timeframes
- 8.3Lesson 3: Top-Down Analysis Process
- 8.4Lesson 4: Finding Higher Timeframe Bias
- 8.5Lesson 5: Aligning Entries with Trend Direction
- 8.6Lesson 6: Supply and Demand Across Timeframes
- 8.7Lesson 7: Entry Confirmation on Lower Timeframes
- 8.8Lesson 8: Avoiding Conflicting Signals
- 8.9Lesson 9: Building a Complete Trading Plan
- 8.10Lesson 10: Real Trading Examples
- 8.11End of Section Multiple Choice Quiz – SECTION 8: Multi-Timeframe Analysis0 Questions
- SECTION 9: Risk Management and Trade ManagementDevelop strong risk control techniques for supply and demand trading. Learn how to set stop losses, manage open trades, and optimize risk-to-reward ratios effectively.11
- 9.1Lesson 1: Importance of Risk Management
- 9.2Lesson 2: Position Sizing Explained
- 9.3Lesson 3: Calculating Lot Sizes
- 9.4Lesson 4: Risk-to-Reward Ratios
- 9.5Lesson 5: Stop Loss Placement
- 9.6Lesson 6: Take Profit Strategies
- 9.7Lesson 7: Scaling Into Positions
- 9.8Lesson 8: Managing Open Trades
- 9.9Lesson 9: Trading Psychology and Discipline
- 9.10Lesson 10: Building Long-Term Consistency
- 9.11End of Section Multiple Choice Quiz – SECTION 9: Risk Management and Trade Management0 Questions
- SECTION 10: Building a Complete Supply & Demand Trading SystemBring everything together into a complete trading system. Learn how to build a structured supply and demand strategy with clear rules for entries, exits, journaling, backtesting, and disciplined execution.11
- 10.1Lesson 1: Creating Your Trading Rules
- 10.2Lesson 2: Developing a Trading Checklist
- 10.3Lesson 3: Creating a Trading Journal
- 10.4Lesson 4: Backtesting Supply & Demand Strategies
- 10.5Lesson 5: Forward Testing in Live Markets
- 10.6Lesson 6: Common Supply & Demand Trading Mistakes
- 10.7Lesson 7: Daily Trading Routine
- 10.8Lesson 8: Weekly Market Preparation
- 10.9Lesson 9: Case Studies and Trade Reviews
- 10.10Lesson 10: Becoming a Professional Supply & Demand Trader
- 10.11End of Section Multiple Choice Quiz – SECTION 10: Building a Complete Supply & Demand Trading System0 Questions
You May Like

Forex Trading Strategy Masterclass
MASTER PRICE ACTION FOREX TRADING STRATEGIES. Learn How to Trade Forex Using Proven High-Probability Setups (Step-by-Step System). Stop Guessing. Start Trading With Structure. Most beginner traders fail not because forex is complicated—but because they trade without a clear system. They …

Advanced Liquidity & Smart Money Trading Masterclass
MASTER ADVANCED LIQUIDITY TRADING STRATEGY. Learn How Smart Money Uses Liquidity to Enter and Exit the Forex Market with Precision. Stop Chasing the Market. Start Trading Like the Institutions. Many traders struggle to achieve consistent profits because they don’t understand …
Smart Money Concepts Mastery for Forex Traders
MASTER SMART MONEY CONCEPTS THAT EVERY TRADER MUST KNOW. Learn How Institutions Move the Forex Market and How to Trade Alongside Them. Stop Trading Like a Retail Trader. Start Thinking Like Smart Money. Most traders struggle not because forex is …
Inside Bar Candlestick Forex Trading Strategy Mastery
MASTER THE INSIDE BAR TRADING STRATEGY. Learn How to Trade Market Consolidation Breakouts with Precision and Confidence. Stop Entering Random Breakouts. Start Trading Structured Price Compression. Most traders struggle because they enter the market without understanding what price is actually doing …
Pin Bar Candlestick Forex Trading Strategy Masterclass
MASTER THE PIN BAR TRADING STRATEGY. Learn How to Trade Reversal Signals with High-Probability Price Action Setups. Stop Entering Trades Too Early. Start Trading Rejections With Precision. Most traders lose money because they misread market reversals and enter trades without …

Course Features
- Lectures 99
- Quizzes 10
- Duration 365 days
- Skill level Intermediate
- Language English
- Students 280
- Certificate Yes
- Assessments Self